PUBG NEW STATE is the official remake of the PUBG Mobile STATE and brings back all of the features along with some extra additions. That being said, game dynamics are more or less the same as the PUBG Mobile STATE. This also means that you need to understand the sensitivity settings as it plays an important role. The settings not only help you in increasing your movement but also in aiming and recoil control. In this article, we are going to show you the best sensitivity settings for PUBG NEW STATE, which will definitely help you to enhance your gaming experience.
What are Sensitivity Settings in PUBG NEW STATE?
Sensitivity settings in PUBG: NEW STATe help you enhance your overall gaming experience. There are different types of settings available in the game, which might be confusing for many. In order to break it out for you, there are three major sensitivity settings including camera, ADS or aim down sight, and gyroscope. Each set helps you in movement, aiming for the enemy, and more. Although the game offers some pre-loaded settings that generally come as Low, Medium, and High. It is always good to go for a customized setting as it helps you get better control over the game dynamics and increases your chance to win a match more.
[Graphics Settings]
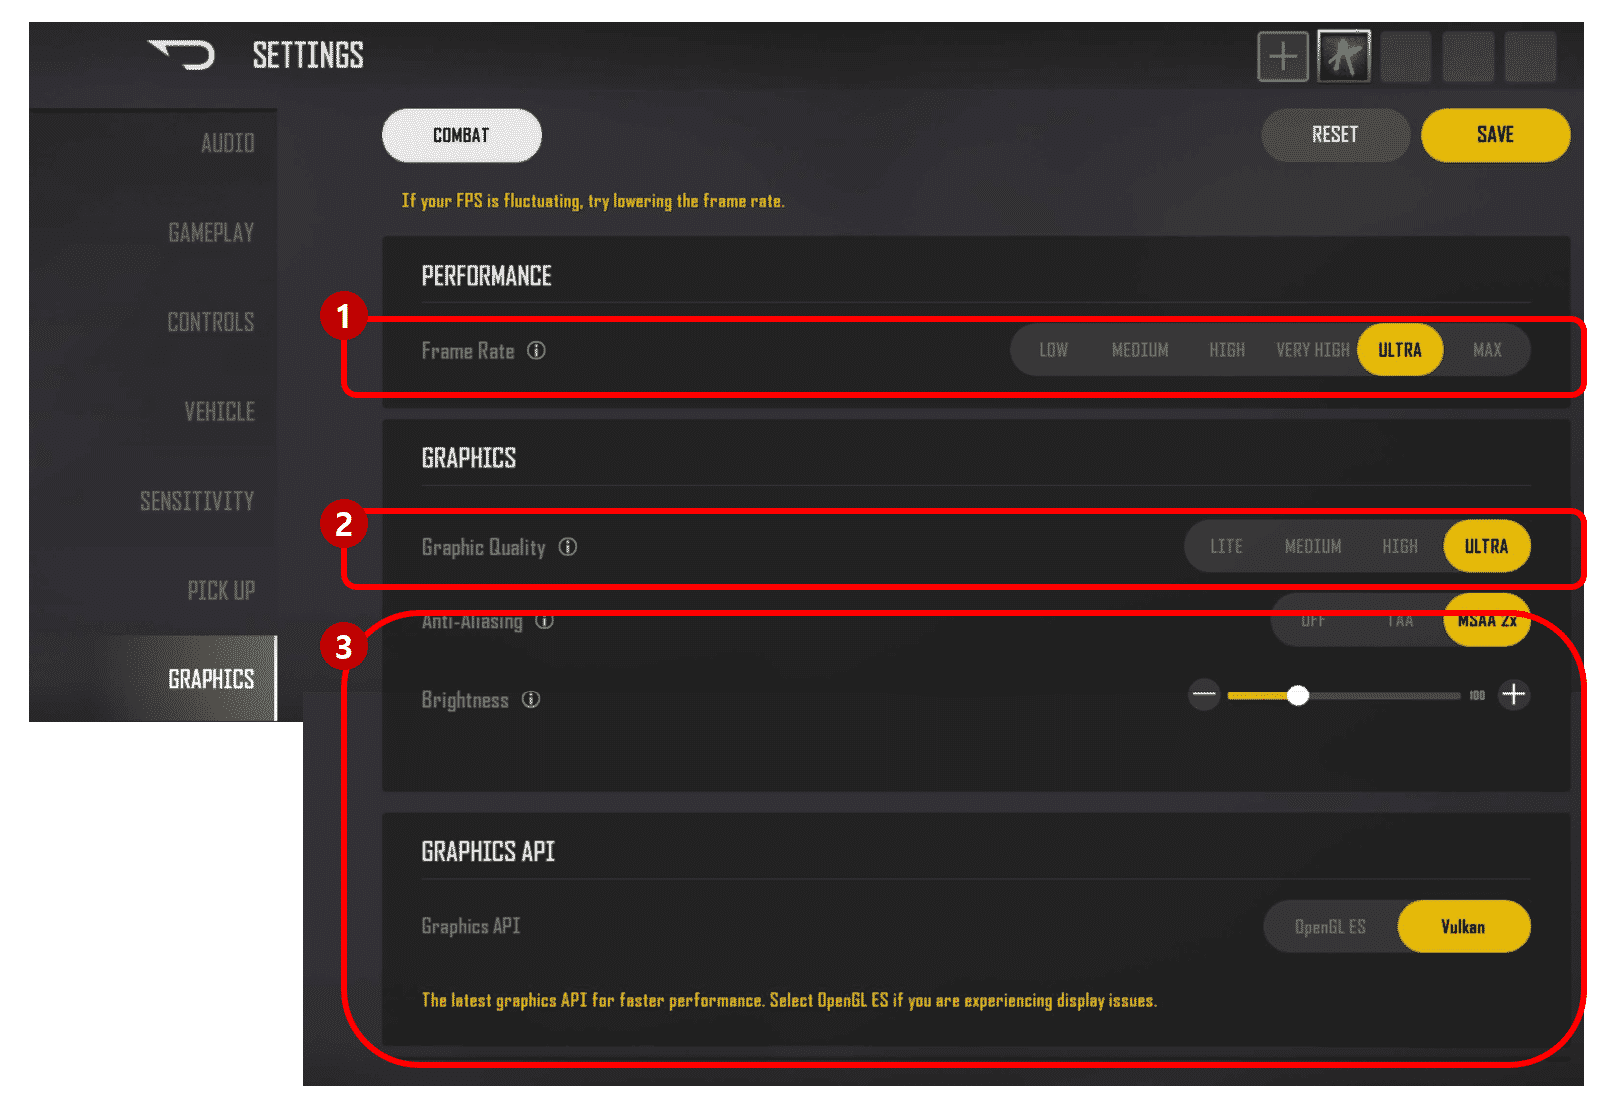
You can adjust graphics settings in [SETTINGS] -> [GRAPHICS].
Performance / Frame Rate
Adjust frames per second (Recommended option: ULTRA / If you want a higher frame rate: MAX, EXTREME)
Graphics / Graphics Quality
Select graphics options (Recommended option: Use ULTRA settings for the best graphical experience during the test)
As the game is optimized for the test device, we recommend not changing the options in this section.
[Combat Settings]

You can set up combat options in [SETTINGS] -> [GAMEPLAY].
Sound Tracker
An option to show a sound indicator on the center of the screen.
Sound Tracker with Icon
An option to add an icon to the Sound Tracker. If disabled, only sound-related colors are displayed.
3D HUD
An option to display an immersive 3D HUD on the center of the screen.
Heal Widget Instant Use
An option to add an icon to the Sound Tracker. If disabled, only sound-related colors are displayed.
[Vehicle Control Settings]
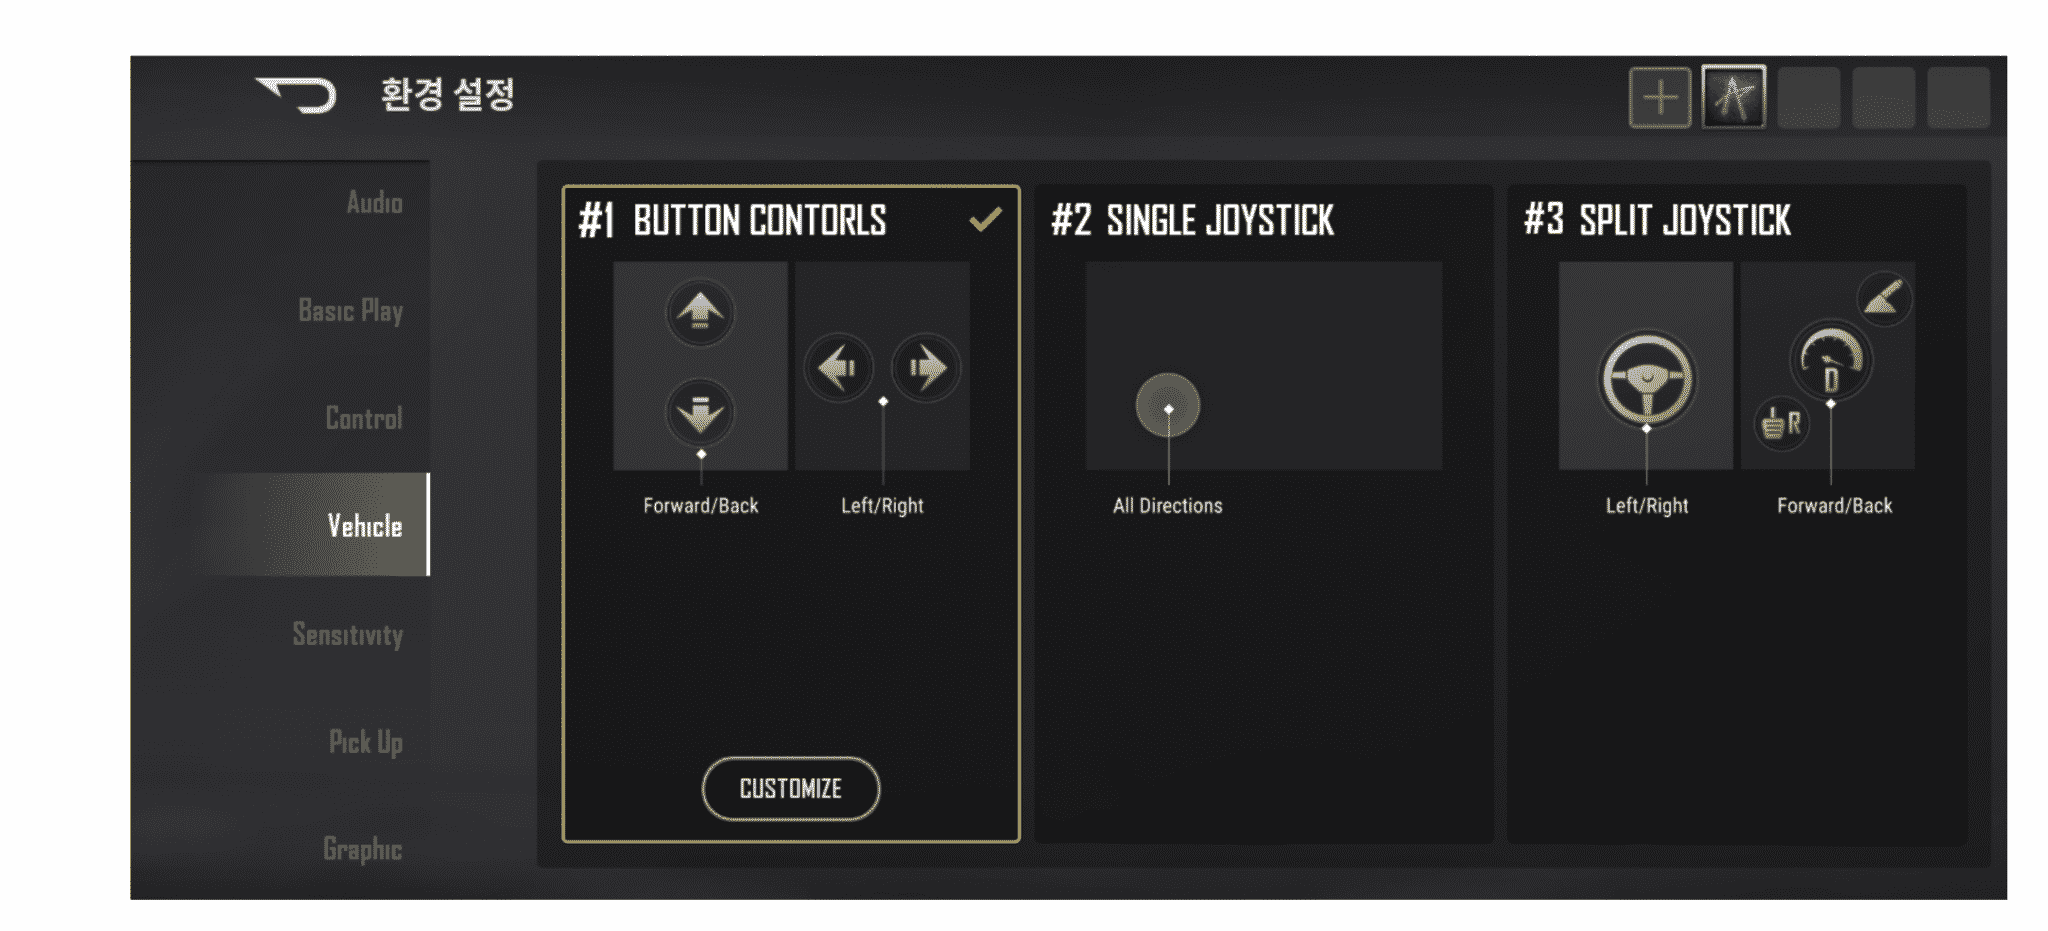
You can set up vehicle controls in [SETTINGS] -> [VEHICLE].
Button Controls
The most common control scheme with Forward/Back and Left/Right buttons.
Single Joystick
Control the vehicle with a joystick.
Split Joystick
A mixture of schemes 1 and 2. Control the vehicle with forwarding/Back buttons and a joystick.
[Control Settings]
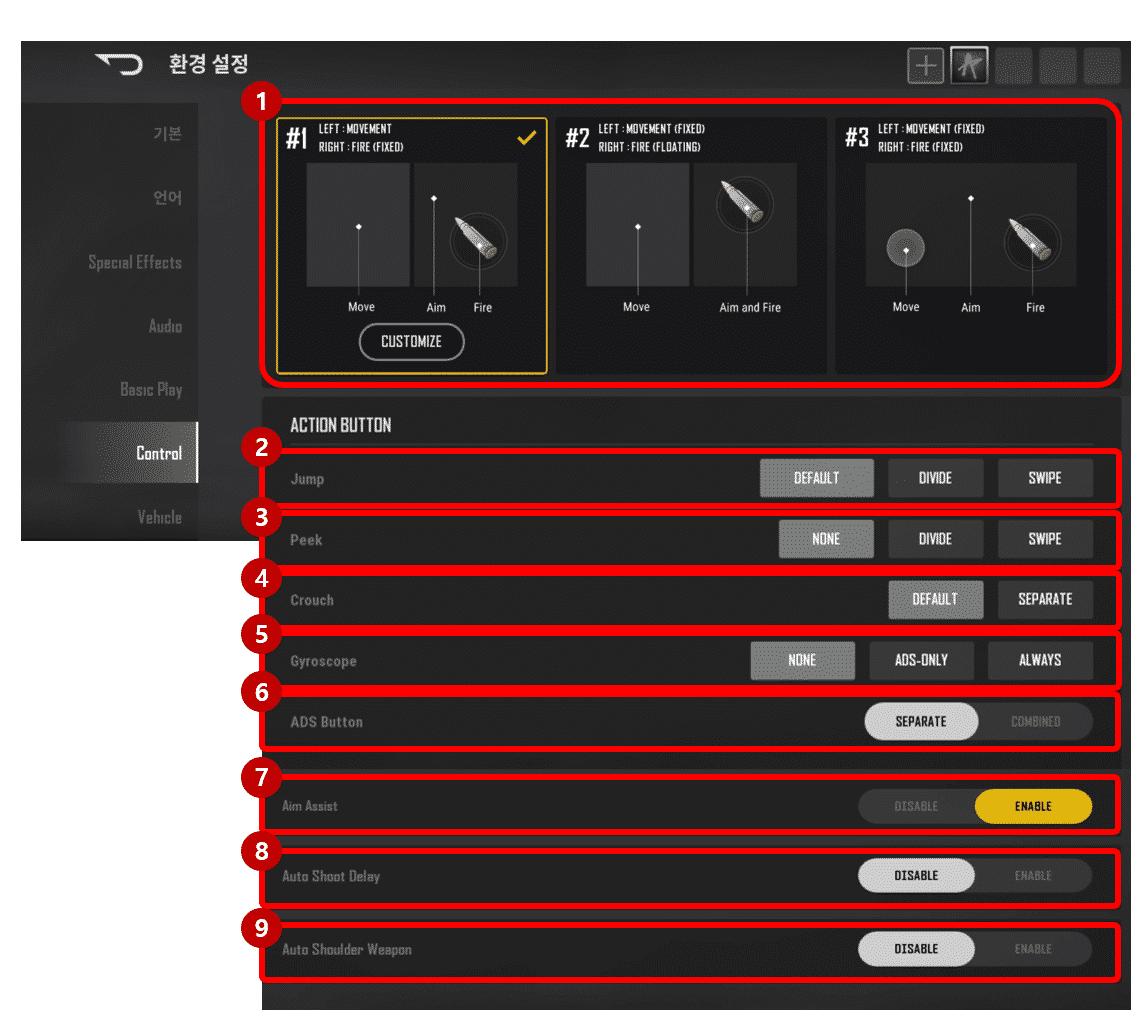
- Set up Basic Controls in [SETTINGS] -> [CONTROL].
- #1 LEFT: Movement, RIGHT: Fire (Fixed)
- Move with the left-side screen. / Aim with the right-side screen and fire with the fire button.
- #2 LEFT: Movement (Fixed), RIGHT : Fire (Floating)
- Move with the left-side screen. / Aim and fire with the right-side screen only.-
- #3 LEFT: Movement (Fixed), RIGHT : Fire (Fixed)
- Move with the left joystick only. / Aim on full screen. / Fire with the fire button on the right.
- Separate Parkour from Jump.
- Separate Left/Right Peek from Peek and change the control option to Swipe.
- Left/Right Peek is “None” by default. To use it in the game, you must select “Divide” or “Swipe”.
- Divide Roll from Crouch (Default = double tap to roll).
- Use Gyroscope.
- Separate Shoulder Aim from ADS Button.
- Separate: Able to use Shoulder Aim button
- Combined: Tap and hold to aim over the shoulder
- Toggle Aim Assist on or off.
- Continuously shoot at a certain rate by tapping and holding the fire button in single/burst mode
- When firing, you will automatically aim over the shoulder.
[Button Layout]
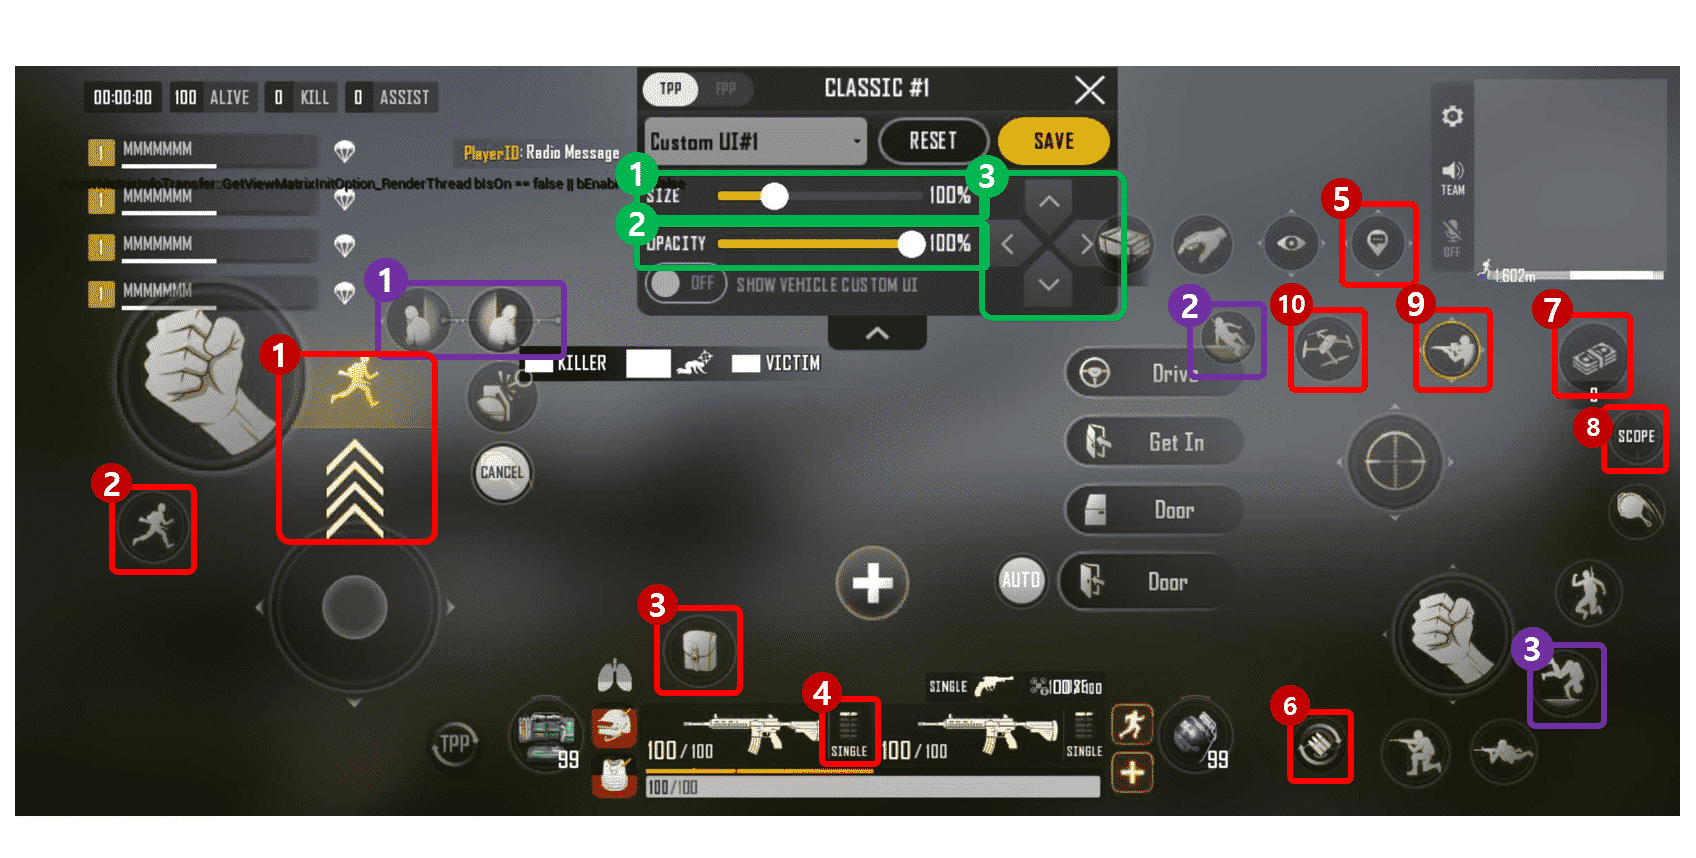
- You can customize the button layout by going to [SETTINGS] -> [CONTROL] -> <Control Scheme> and tapping [Customize].
- You can adjust the position of a UI element by tapping and dragging the element or selecting Custom UI.
UI Adjustment
- Size: Adjust the size of the selected button.
- Opacity: Adjust the opacity of the selected button.
- You can move the selected button to the left/right/up/down with more precision.
Detailed Guide to Buttons
- Sprint range: Adjust the swipe range to trigger sprint.
- Sprint: Character starts sprinting in the direction they’re facing.
- Open Inventory.
- Change Firing Mode.
- Send out a Radio Message.
- When tapping/double tapping this icon, a marker will be placed where the crosshair is pointing.
- When tapping and holding, a wheel widget will be displayed, and you can select which message you want to broadcast.
- Reload.
- Drone Store: When tapped, the Drone Store window will appear.
- Scope change: Swap the scope of the weapon you are using without opening your inventory.
- Aim over the shoulder.
- Deploy a Search Drone.
Buttons You Can Set to Use
- Left/Right Peek: Choose between Swipe and Left/Right. You can’t use this feature until you set it in [CONTROL].
- Parkour: Go to [CONTROL] -> “Jump” and tap “Divide”. If you move with the button pressed, your character will automatically parkour when available.
- Roll: Go to [CONTROL] -> “Crouch” and select “Separate”. When “Roll” is disabled, double tapping the “Crouch” button triggers a combat roll in the direction your character is moving in.
[Pick Up Settings]
You can set up pick-up controls in [SETTINGS] -> [PICK UP].
In addition to <Auto Pick-Up>, you can set up detailed options such as <Auto Ammo Pick-Up> by weapon for each weapon category.
pubg new state sensitivity settings for iphone 12 pro max
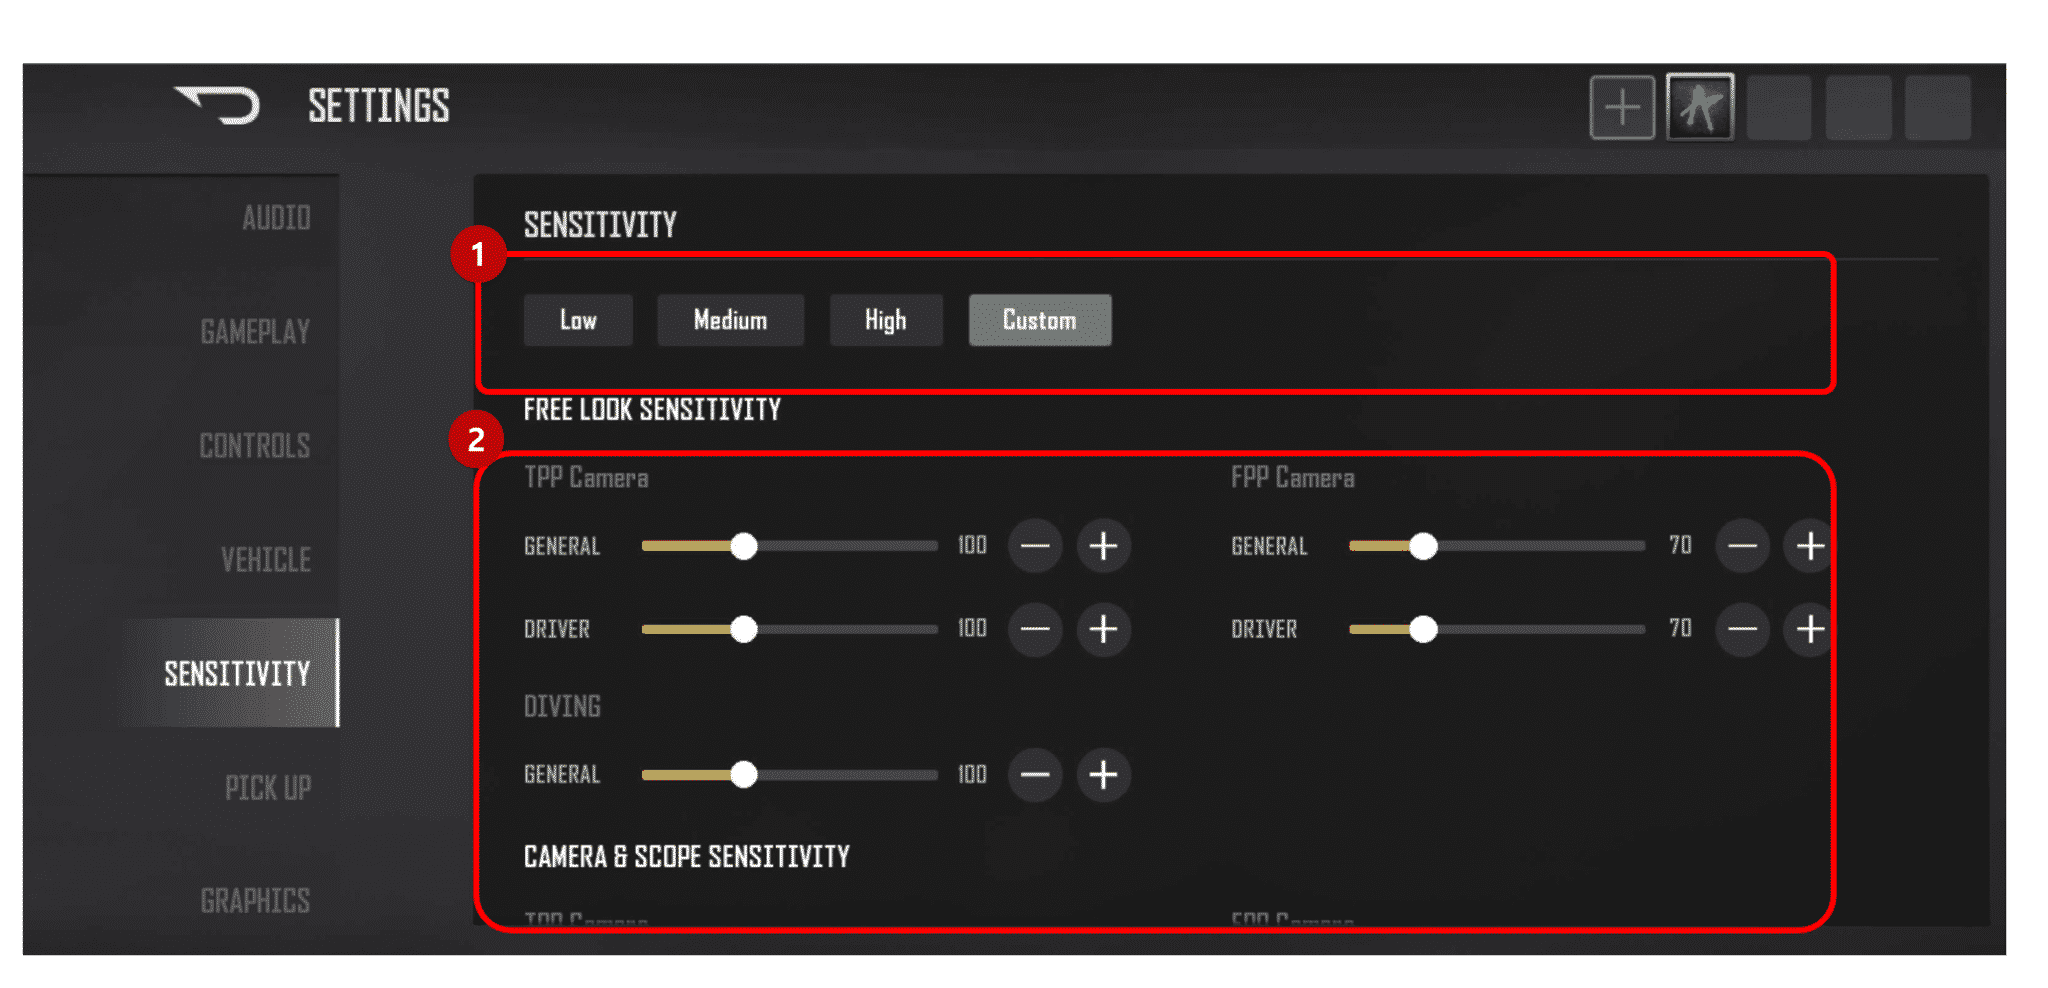
You can adjust your sensitivity in [SETTINGS] -> [SENSITIVITY].
- You can select between Low / Medium / High.
- You can adjust the sensitivity with more precision.